
Lessons:
A-9 Frank Stella
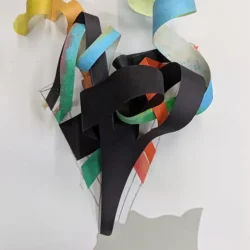
K56 (larger version)
Overview
- Discuss K56 (larger version) by Frank Stella.
- Learn about spatial art and using color to lead the eye.
- Create a sculpture color collage.
Reflection
- Who lives in the house that you created?
- What colors and objects did you add to describe mood of the house?
- What is the title of your artwork?

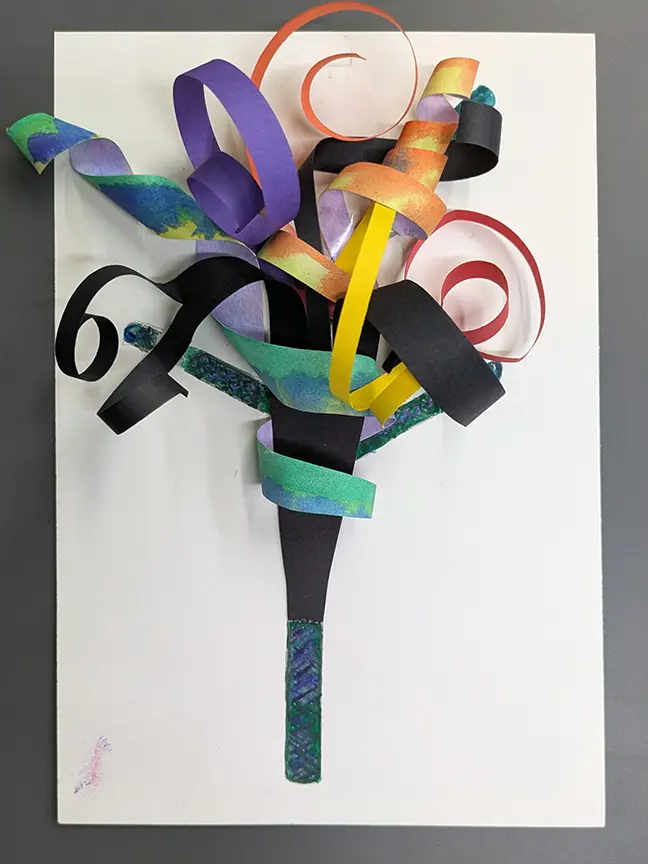
K56 (larger version) by Frank Stella, 2013, ABS RPT and stainless steel (plastic and metal), 114 × 107 × 82 in. (289.56 × 271.78 × 208.28 cm), gift of Marianne Boesky, photo credit: © Museum Associates / LACMA, © 2026 The Estate of Frank Stella / Artists Rights Society (ARS), New York
Discussion Presentation
Discussion Questions
Where in the community would you place this sculpture? And why?
Stella called his works “art as what you see.” They were non-representational– no hidden meaning, story or identifiable subjects. Stella did art purely as an exploration of color, line, and form.
Why doesn’t this crazy explosion of plastic fall over?
The sculpture uses very heavy metal rods to ground it. The massive curving strips of color are light enough to allow Stella to be creative with large dynamic curves of plastic that seem to defy gravity.
How would the form seem to change if blue was swapped for white?
High contrast, bright colors that stand out are the area of focus. Low contrast, neutral colors that don’t stand out, recede into the background. The visual shape that your eyes focus on would change.
Biography
- Frank Stella (FRANK STEL•uh) was an American artist from Malden, Massachusetts. paper in half lengthwise.
- Minimalist art in New York started in the 1960s, but has been around for centuries.
- In his later years (2000s), he used 3D-printing and computers to explore “painting” sculptures.
- His artworks were HUGE. One of his smallest pieces, Double Concentric: Scramble, is 69 x 183 in. – that is over 5 feet tall and 16.5 feet wide.

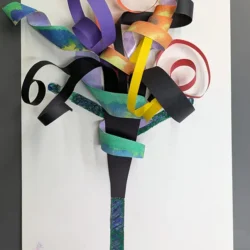
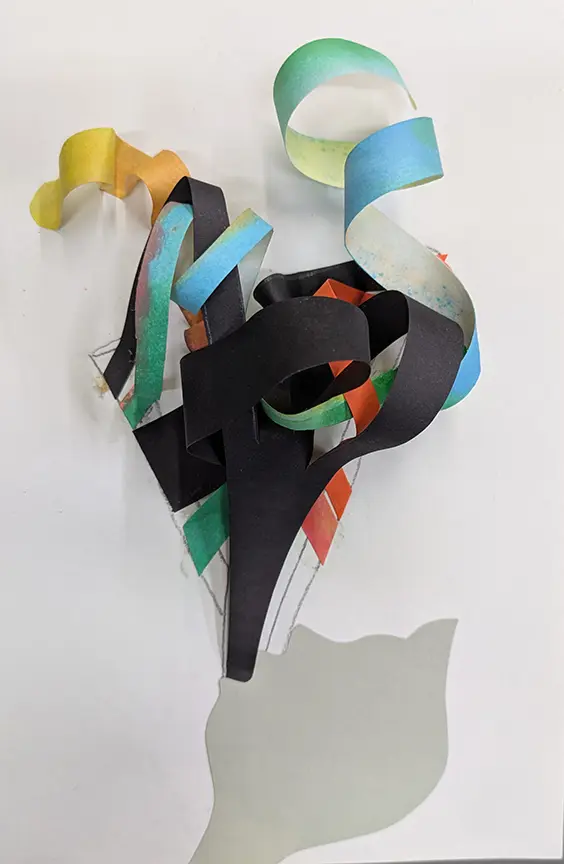
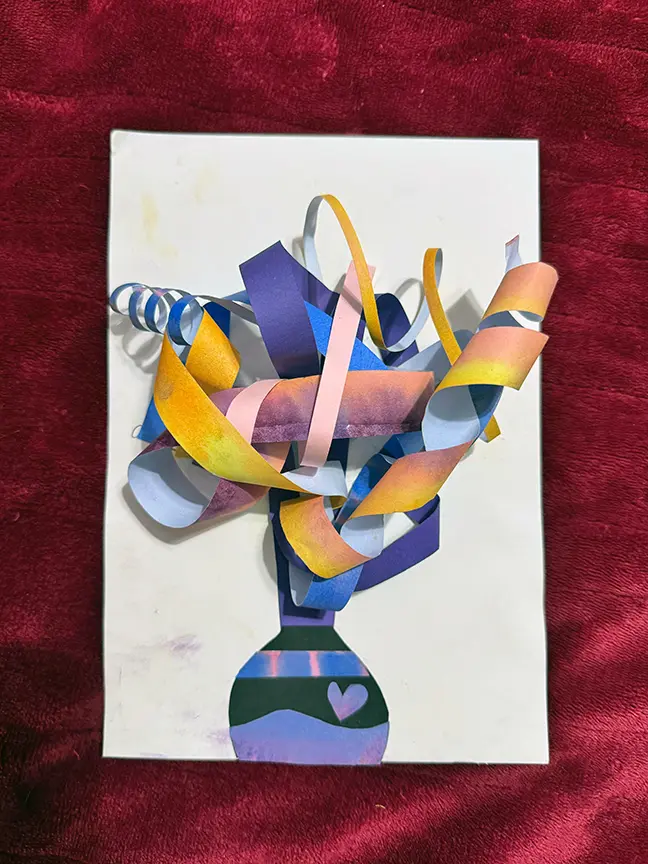
Project
Materials
- sketch paper
- 6×9 white paper
- 3×12 white paper
- 1.5×9 assorted paper
- 3×9 assorted paper (shared)
- drawing pencil
- scissors
- watercolors
- watercolor brush
- 2 paper towels (one to place under paper)
- water dish
- white glue
Warm Up & Brainstorm
- No warmup required.
Project Directions
Sculptural Collage
1. Painted paper.
Use watercolors to paint 3×12 white paper with bold colors. Blot excess paint areas and set aside to dry.
2. Add vertical post and angled bars.
Draw a vertical post and two v-like branches on 6×9 white paper.
3. Add fork shape strip.
Cut 1.5×9 in. solid color strip into a fork-like shape. Cut 3-4 strips for curling from the top wide-end of the fork-shape. Glue narrow end onto vertical post.
4. Make thin and wide color strips.
Cut painted paper and select colored paper.
5. Sculpting curved strips of color.
Glue one end (hold down 15 sec.), explore intertwining the strip, and glue other end.
Tip: attach ends to angled branches or elsewhere on the paper.
Pre-Lesson Preparation
- Pre-prep: each student gets one 1.5×9 color strip. Cut one 6×9 assorted tocreate four strips.
- Pre-prep: cut 6×12 whitepaper in half lengthwise
Day of Lesson Setup
- Tip: students select three 3×9 assorted paper to create their sculpture collage.
- Demo cutting lengthwise thin and wide strips (¼ -½ in.).
- Demo cutting a fork-like shape with 2-3 vertical cuts from 3×6 assorted paper.
- Demo gluing a fork-strip, then adding a painted paper strip that curves or curls and intertwines with the fork-strip.